Image Map
Showing posts with label Fun with Chinese Characters. Show all posts

Wednesday, September 30, 2015

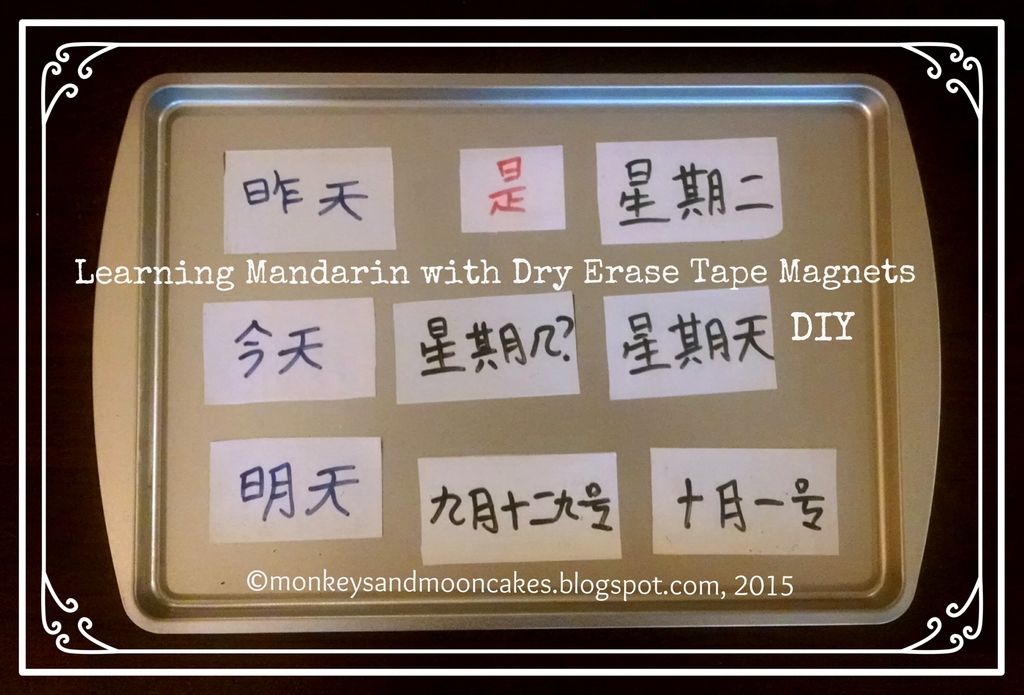
Learning Mandarin with Dry Erase Tape Magnets: DIY

Happy (a few days late) Mid-Autumn Festival! 中秋节快乐!Zhōngqiū jié kuàilè!

Did you see the Supermoon eclipse? I hope so! Unfortunately, we were clouded over and did not see one bit of that beautiful moon. No moon cakes for us either (my kids refuse to eat them). 

But we did learn how to write "moon" (月亮, yuèliàng) and say:

"Mid-Autumn Festival is on Sunday"  
中秋节是星期天。Zhōngqiū jié shì xīngqítiān.

                                                             &

"Mid-Autumn Festival is September 27." 
中秋节是九月二十七号。Zhōngqiūjié shì jiǔyuè èrshíqīhào.

I noticed that my daughter and her friend were struggling a little with sentence order as they translated these English sentences into Mandarin. I remember going through this as a beginning Mandarin student -- knowing which words to say but struggling with putting them together in the right order in Mandarin. 

Then, yesterday I saw dry erase tape at our local hardware store and thought, "How cool is that! What project could I make to justify buying that super cool office supply?"  

A few hours later, Eureka! I was making dry erase magnets on which I wrote Mandarin phrases and words that the girls could then rearrange to make sentence construction just a little easier. 

*******************************************************

Here's the DIY:


Materials
  • Scotch Dry Erase Tape
  • magnets (I used the many freebies we receive in the mail from doctors, dentists, etc...)
  • cookie sheet (I bought mine at the Dollar Store)
  • dry erase markers

Steps  This is so easy peasy. Just 3 simple steps.
  1. Stick dry erase tape onto magnets. It removes very easily as well.
  2. Cut to size. The cheapo freebie magnets are thin and easy to trim down.
  3. Write your Mandarin words and phrases on the magnets with dry erase markers and stick them to the pan.  And done!

Now,here's how we used the magnets 
  • I spoke sentences in Mandarin which the girls, then, had to piece together using magnets on the cookie tray.
  • I built a question out of magnets on the tray, and they had to answer it by swapping out the question word/phrase (i.e. 星期几? Xīngqí jǐ 几月几号? Jǐyuè jǐhào) for the correct answer magnet or by writing the answer on a blank magnet. 
  • I asked a question out loud that the girls then had to answer by: 1st--forming their answer with magnets on the tray, 2nd--reading their Mandarin sentence out loud, and 3rd--translating the sentence into English.
  • I used the magnets to form a sentence that had an error (i.e. Mid-Autumn Festival is on Friday. 中秋节是星期五。Zhōngqiū jié shì xīngqíwǔ), and then asked them to correct the error. 
So that's what we did in a nutshell. I'm excited to explore other ways we can use this learning tool in our Mandarin lessons. 

If you make dry erase magnets for your Mandarin learning, leave a comment below. I'd love to know how you used them!

post signature

Thursday, April 23, 2015

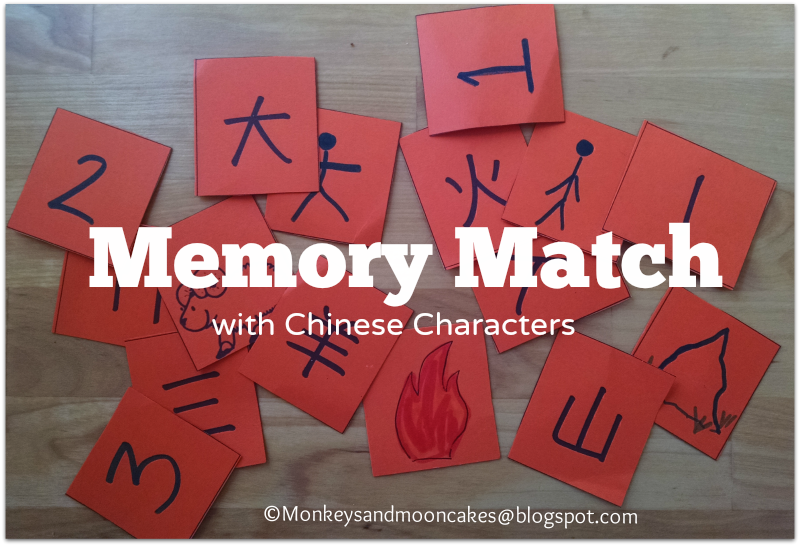
Memory Match with Chinese Characters

I am always on the lookout for fun and simple ways to review the Chinese characters we learn each week. After a few months, the number of characters start to add up and without the review, they quickly become forgotten.

Here is one easy-peasy-lemon-squeezy (as my kids would say) way to review Chinese characters. 


How to play: 

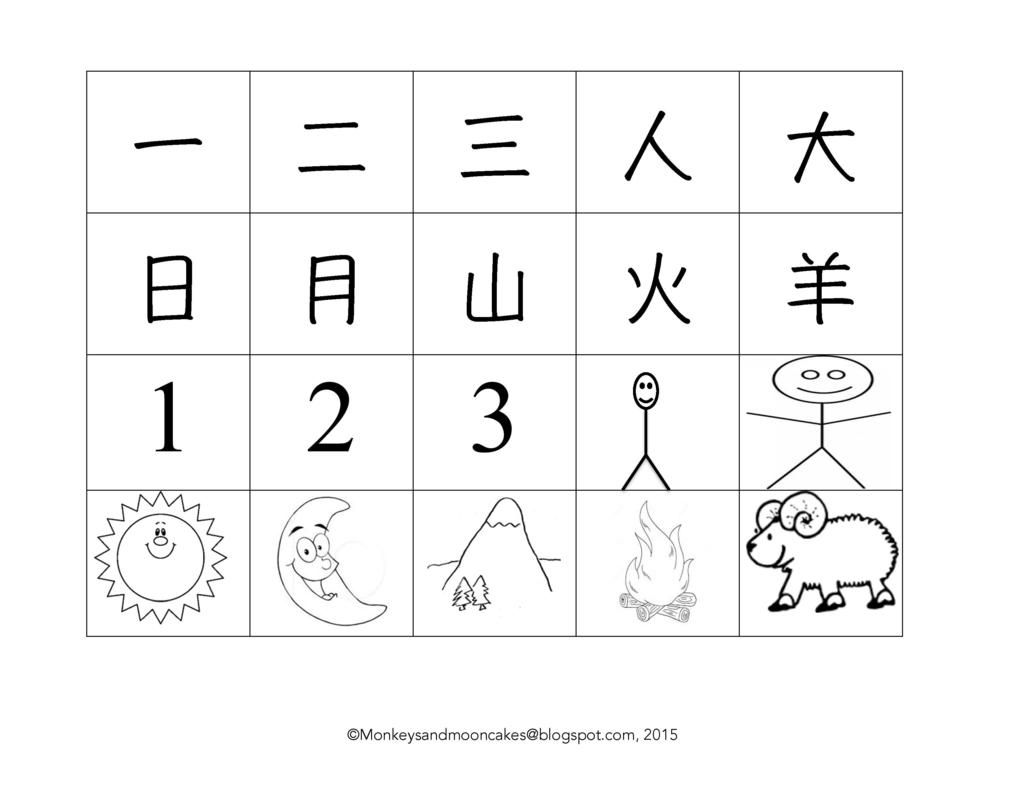
  1. Type up and print out the Chinese characters you have been learning. Use font that is large (I used 60 pt) and easy to ready (I used Hannotate SC because it looks like the characters are handwritten). 
  2. Draw their picture match, or if you are artistically-challenged (like me=) print out clip art.
  3. Gluestick characters and pictures on to cardstock squares or love the earth and re-use cards from an old memory match game.

OR 

  1. Forget steps 1-3 and print out this set:


Helpful hints: 

  • If you want to review Chinese characters that are not simple pictographs, match Chinese characters with their English translations. 
  • Start small. (My K-2 kids match 10 characters-20 cards total, at the end of each 6-week class.) Once they master a few, add to it. It will be a great way to reinforce their character recognition. 

Why this works: 

  • My kids (and probably yours too) have been playing this game since they were little tykes. They know the rules and are able to easily adapt to playing with Chinese characters.
  • It's flexible: Play as a group or individually. Play with 10 cards or 100. Change the characters on the cards as your kids' character memory bank grows.

How do you review Chinese characters in your home? 

post signature

Friday, March 20, 2015

7 Great Resources for Learning Chinese Visually


This past year, I've stumbled upon all sorts of resources--videos, apps, websites, and books--that teach Chinese characters through colorful graphic art and design. 

It's a beautiful thing--this coming together of educators and graphic artists to create these new resources.

I have found their ideas to be so effective in my home. My kids love having a visual image to link to the characters they are learning.

Here's a quick review of 7 Great Resources that teach Chinese characters visually:
  

1. Chineasy

What it is: 
  • This website is dedicated to teaching people about the Chineasy method, which was developed by Shao Lan as a way to teach people to read Chinese easily by recognising characters through simple illustrations.
What they offer: 
  • The Chineasy approach introduces building blocks (simple pictographs), and then compounds (made up of 2 or more building blocks), and finally phrases (consisting of 2 or more independent characters)
  • She's fully connected to social media--You can follow Chineasy on Facebook, Twitter, Pinterest, GooglePlus, or subscribe to the website.
What I love:
  • The beautiful, boldly-colored graphic illustrations created by graphic designer Noma Bar. These are works of art!
A Wish:
  • I wish there were more characters offered!! Maybe a Volume 2?


2. chi.guru

What it is: 
  • This is a subscription-based website from Switzerland that uses videos for teaching Chinese language and "picture stories" for teaching Chinese characters.  
  • The picture stories are illustrations/graphic depictions of characters and the different radicals that make up the characters. For example, the character 四 (four) is made up of the character for child (儿) and mouth (口). 
What they offer: 
    • I have not subscribed to their site, and have not viewed their teaching videos, but they offer access to a number of "picture stories" for free. 
    What I love:
    • The simple illustrations effectively convey the meaning of the characters. 
    A Wish:
    • I wish they offered downloadable or print materials of their picture stories for purchase--they are the real gems of the website. 


    3. The Learning Lotus Project 

    What it is: 
    • This is described as a "visual-based learning system for reading and writing Chinese characters" 
    • Created by an educator, graphic designer, and developer, they describe the purpose of their project as "sharing the richness of the characters' form through visual illustrations and the fascinating logic and cultural insight behind each character."
    What they offer: 
    • They post illustrations of radicals, pictographs, and compound characters.
    • You can follow them on Facebook, Twitter, Instagram. Images can be Pinned.
    What I love: 
    • Their graphic illustrations of the characters are beautiful--multi-colored, and cleverly designed. They convey the meaning of the characters easily within one illustration. 
    A Wish:
    • Again, I wish that some of these images were offered in print or downloadable form. It would be wonderful to use them in the classroom. 


    4. choumeizai Youtube Channel 

    What it is: 
    • They describe themselves as "A fun and easy way to learn Hanzi."
    What they offer: 
    • Short videos that show the evolution of Chinese characters from oracle bone inscriptions to modern characters.
    What I love: 
    • I've found some of these videos really helpful in showing students how the meaning of the characters is linked to the ancient oracle bone characters.
    • The background music for each video is very catchy--It will get stuck in your head! 

    5. Monki Chinese Class by Monkimun

    What it is: 
    • An app that teaches kids how to write beginning Chinese characters through tracing  characters on the screen with their finger. When the character is properly traced 2 times, a graphic illustration of the character (pictograph) appears behind the character. 
    What they offer: 
    • 2 levels of tracing speed/difficulty 
      • Level 1: They show you how to write the character and you trace over the still-visible character. 
      • Level 2: They show you how to write the character, and then it disappears. With the help of directional arrows, your write the character with your finger.
    What I love: 
    • When the character is twice correctly traced, the illustrations become animated: The "mouth" tries to bite your hand. The "door" swings open to show a growling monster--very cute!
    A Wish
    • Only 10 characters are offered with the free version. For $4.99 you can buy the full version, but this only gives you 10 more characters. Fantastic idea...just wish more characters were offered!


    6. The Pet Dragon by Christoph Niemann

    What it is: 
    • A picture book about a little girl named Lin Lin and the dragon she receives as a gift.
    • Illustrator, author, and graphic designer Christoph Niemann depicts the meaning of Chinese characters by drawing them into his illustrations: the character 父 (fu, father) becomes Lin’s angry father’s eyebrows and mustache.
    What I love: 
    • The illustrations are super creative, reinforcing the meaning of Chinese characters in a cute story about a girl and her dragon.


    7. Chineasy by Shao Lan Hsueh and Noma Bar

    What it is: 
    • The book behind Shao Lan's Chineasy method. 
    What it offers: 
    • She includes building blocks, compounds, phrases, and advanced sentences in the book, as well as the classic story of Peter and the Wolf told by using the graphic-illustrated Chinese characters--This is brilliant!
    • See my review for more a more detailed review of the book.
    What I love:
    • Noma Bar's beautiful graphic illustrations, and did I mention that the story Peter and the Wolf is included? ; )

    What resources do you use for learning and teaching Chinese visually? 


    post signature

    Friday, February 27, 2015

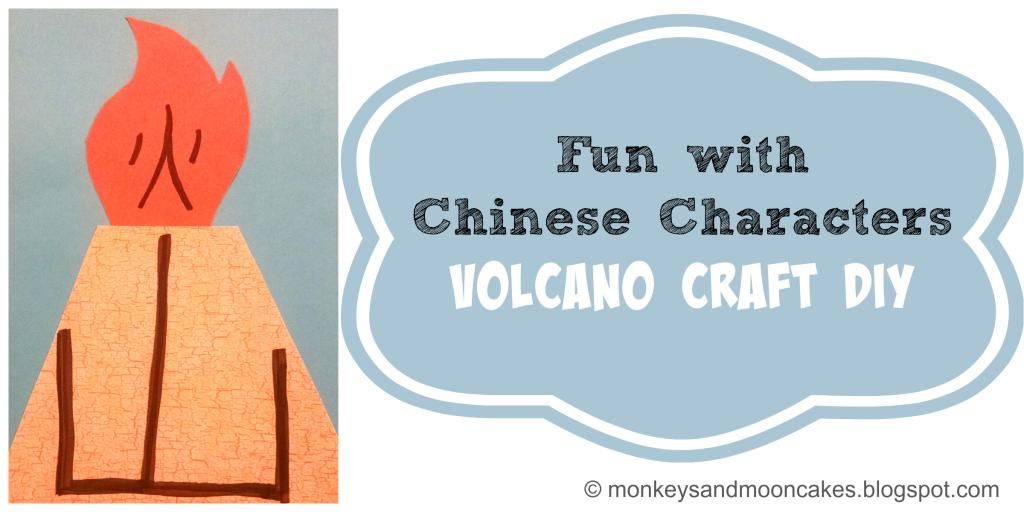
    Volcano Craft DIY

    We have been getting creative learning about Chinese characters that are pictographs. This week we learned how to write the characters for fire (火, h) and mountain (山, shān)I loved watching their little eyes light up as they realized that when you combine these characters, you get the word for volcano (火山, huǒshān ).

    I was inspired by ShaoLan's fire and mountain graphic illustrations (on her Chineasy website) to create this simple craft to help the kids remember these characters.

    What we used for this project:

    • cardstock or construction paper
    • scissors
    • gluestick
    • markers

    What we did: 


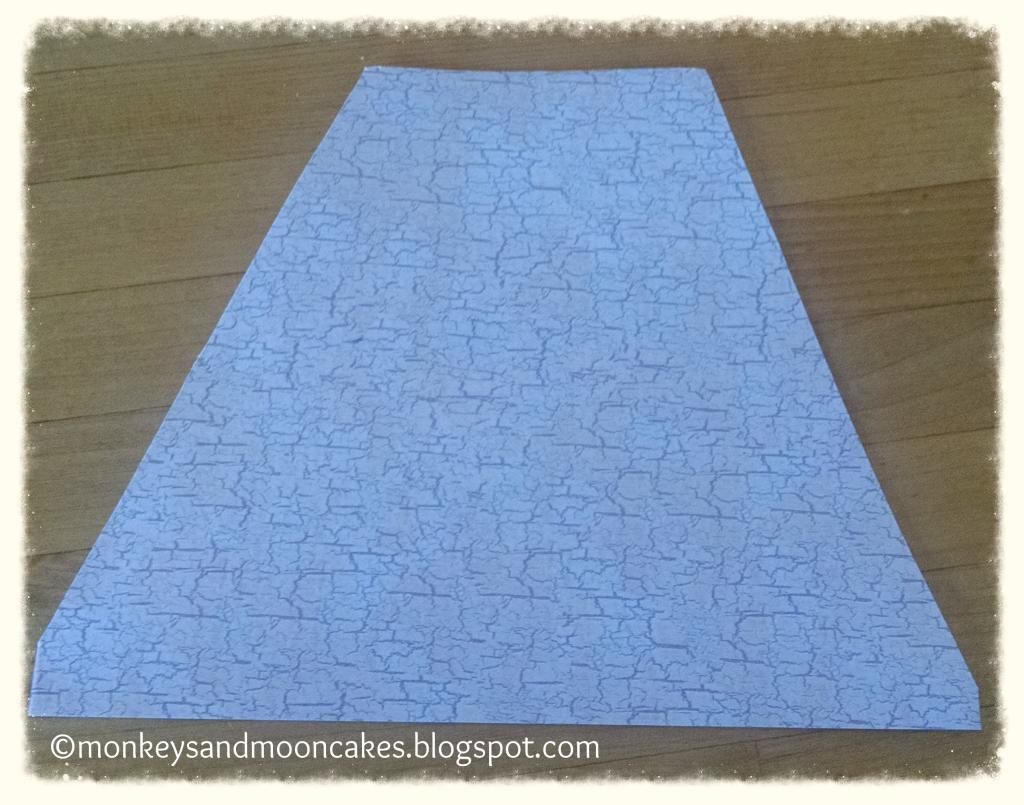
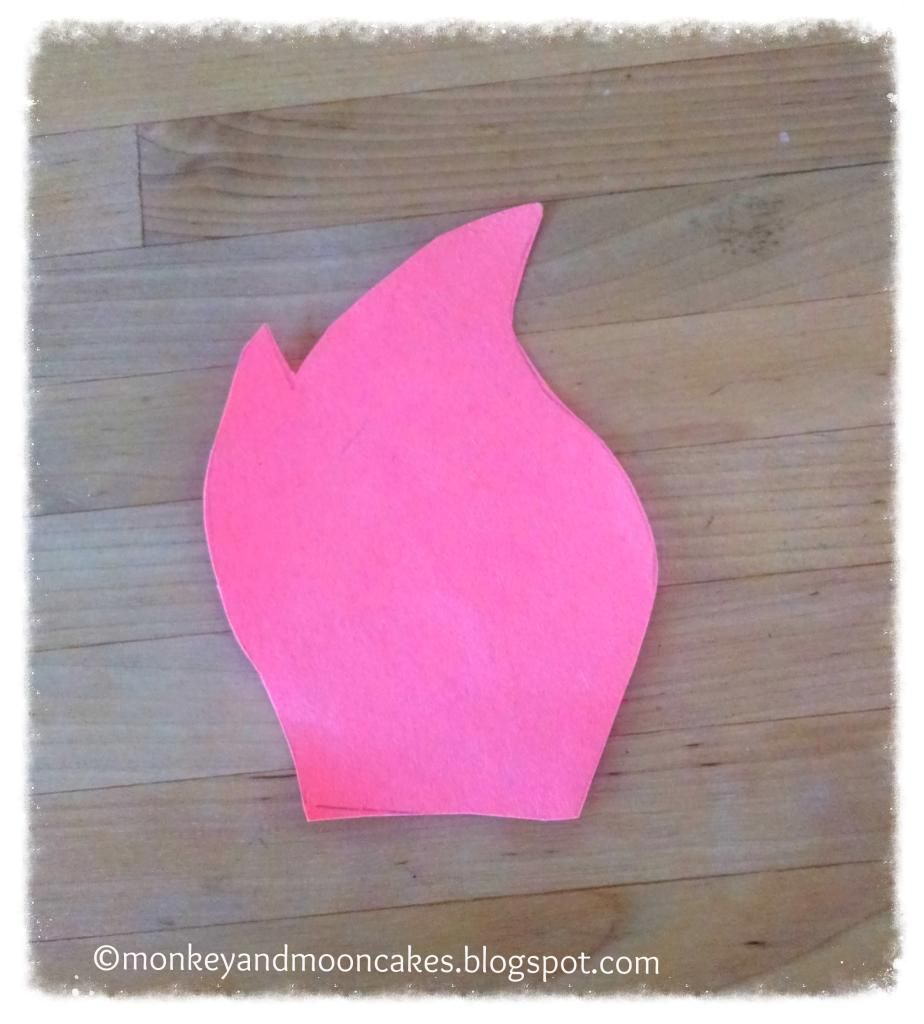
    I prepped the project by cutting out the three pieces:
        1. the backgroundan 8 X 11 cut in half (width-wise)  
       2.  the mountain: We used cool rock-looking 8 X 11 paper cut into quarters 
                (snip off edges to shape into a volcano).


           3. the flame: I just free-hand drew a template and then traced/cut out copies.

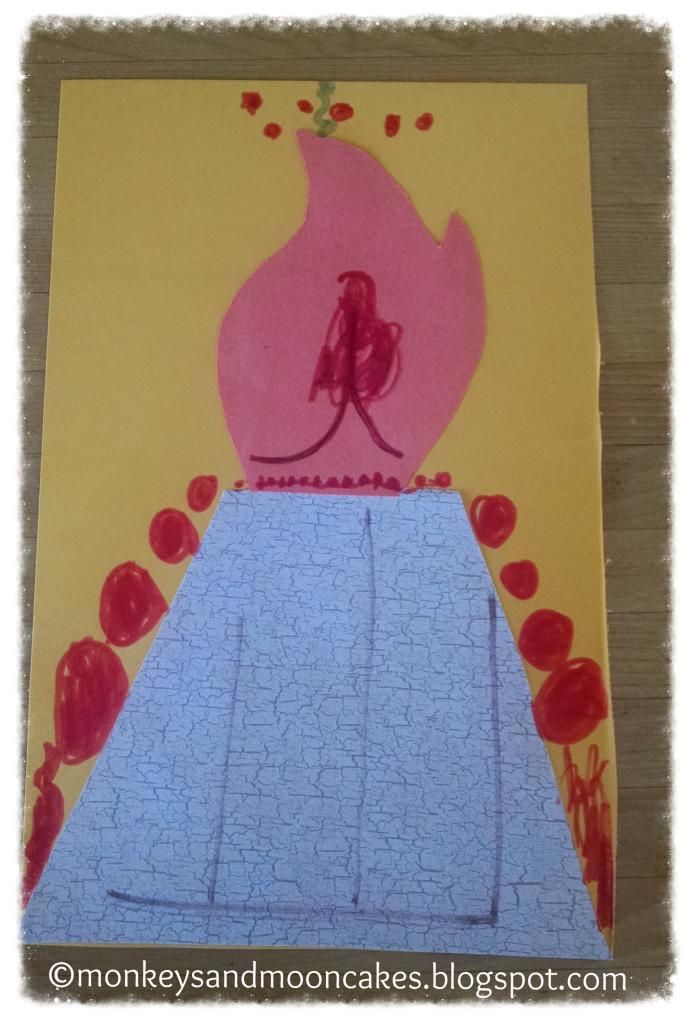
    The kids wrote the character for fire on the flame and mountain on the volcano, and then pasted the two pieces on the card stock background.


    One more thing...
    don't forget the smoke and lava! 

    Don't you love their creativity??


    What art projects with Chinese characters are you creating?


    post signature


    Thursday, February 12, 2015

    Year of the Goat Fun: Craft and Book Review

    This week I've been exploring some great resources for celebrating 羊年 (Yáng nián), the Year of the Sheep/Goat/Ram. The New Year begins on Thursday, Feb. 19 this year and ends on Lantern Festival, March 5.

    Here are two we've brought into our home this year:

    1. Artsy Craftsy Mom's Year of the Goat Car Hanging Craft 
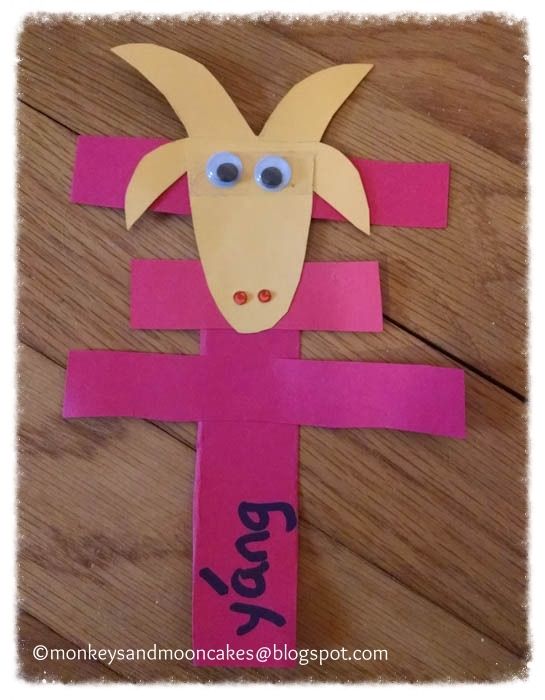
    Our version of Artsy Craftsy Mom's Year of the Goat Car Hanging Craft 
    I saw Artsy Craftsy Mom's super cute, super simple Year of the Goat Car Hanging Craft on Pinterest and decided to adapt it for my elementary Mandarin class. 

    How we adapted it: 
    • We used strips of red card stock for the bottom part of the character (because we were out of craft sticks) and glue stick'ed them together. 
    • We used card stock for the yellow pieces (so they would stick to the red pieces) and then layered them on top of each other (3 in all: horns, ears, and head). 
    • We added some jeweled nostrils to make our goats fancy. 
    • We wrote the pinyin pronunciation on it. 
    Why this craft is great: 
    • It familiarizes kids with the Chinese character for sheep/goat (), while reminding them of the character's meaning (the horns of the goat are the two strokes at the top of the character).
    • Kids love googly eyes--After adding googly eyes, my students' goats came to life, and before I knew it, the goats were introducing themselves to each other (in Mandarin!)

    Artsy Craftsy Mom posted this as part of Multicultural Kid Blogs Chinese New Year Series. Check the rest of the series for more CNY crafts, book reviews and recipes.

    ******

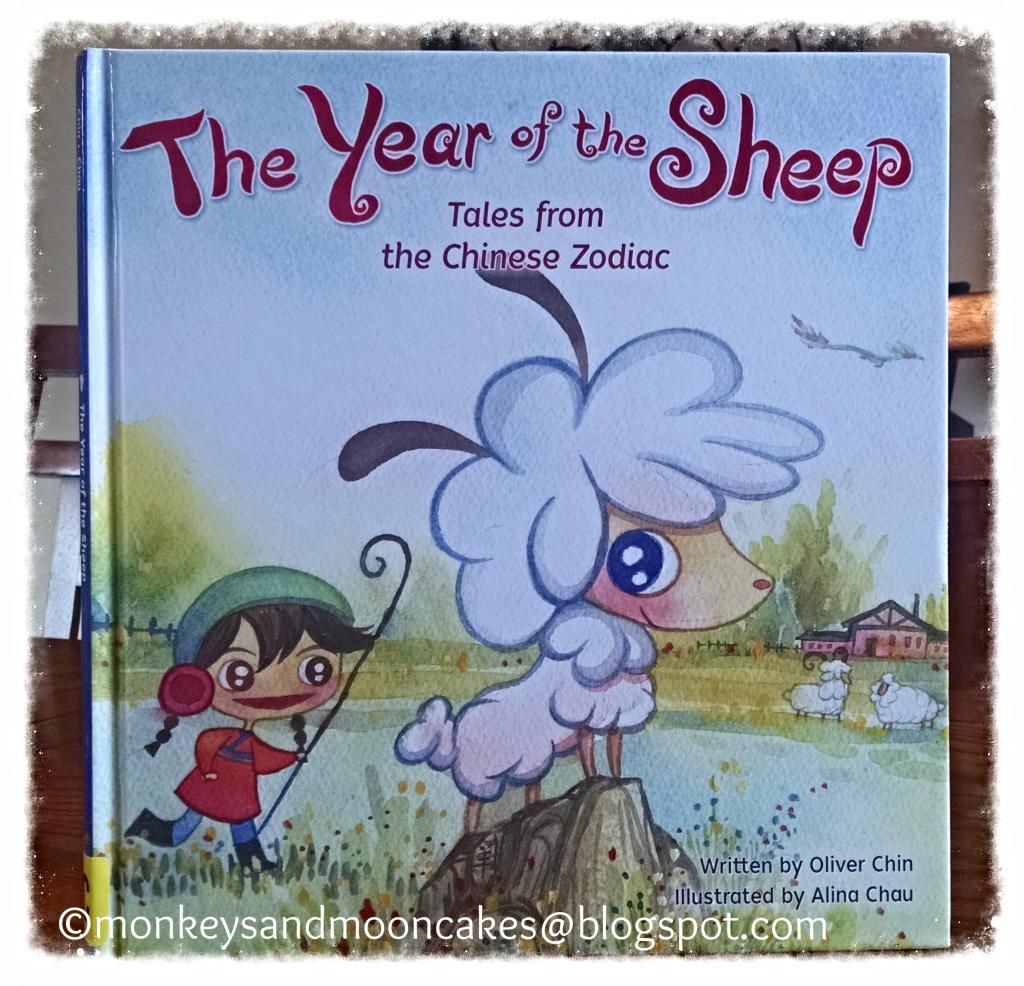
    2. The Year of the Sheep: Tales from the Chinese Zodiac, written by Oliver Chin and illustrated by Alina Chau (published by Immedium)
    The Year of the Sheep: Tales from the Chinese Zodiac
    The Year of the Sheep: Tales from the Chinese Zodiac is the tenth book in Oliver Chin's Tales from the Chinese Zodiac series. He publishes one new book each year, coordinating with the Chinese Zodiac. 

    This book tells the story of the little lamb Sydney whose curiosity leads her, along with Zhi-- the shepherd's daughter, to discover a logjam that threatens the local ecosystem after a storm. Sydney brainstorms a creative solution to the problem, and the twelve animals of the zodiac work together to restore the flowing river. 

    Why this book is great:
    • The little lamb saves the day through her creative thinking.
    • Zodiac animals appear on almost every page. Can you find them? 
    • Alina Chau's beautiful, whimsical watercolor illustrations. 

    Check out Immedium's website to download free coloring pages of Sydney and Zhi.

    How will you be celebrating the Year of the Sheep in your home?


    post signature

    Thursday, November 20, 2014

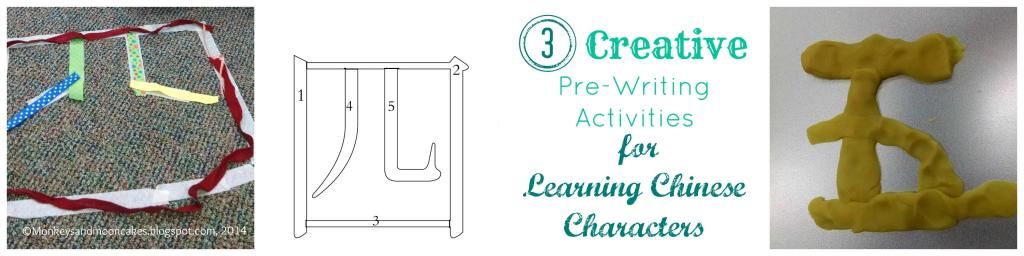
    3 Creative Pre-Writing Activities for Learning Chinese Characters

    This fall, I taught a fun 6-week after-school class at my kiddos' school. My students were all Kindergarteners (and one 2nd-grader).  At our first class,  I realized that this writing thing was pretty new to most of them. School had just started one month earlier, and the kindergartners were just adjusting to holding a pencil and writing their ABC's.  


    Writing Chinese characters was a stretch for them, a good stretch--one that we would work on throughout the 6-week class. But I also wanted to give them a more accessible way to immediately experience the shapes of the characters. 


    Here are 3 of their favorites:

    1.  Tracing characters 

    • Have an adult or big kid help tape the shape of the character on the ground. Use masking tape or painter’s tape because it removes easily and comes in fun colors.  
    • Use ribbons, jump ropes, or shoelaces (basically anything long and shapeable) to follow the shape of the character. We used broken beaded necklaces from dress-ups and ribbons. 
    • This can also be done on a smaller scale with characters printed in large font (300/400).


    ***********************************************************************************


        2.  Color-by-number characters

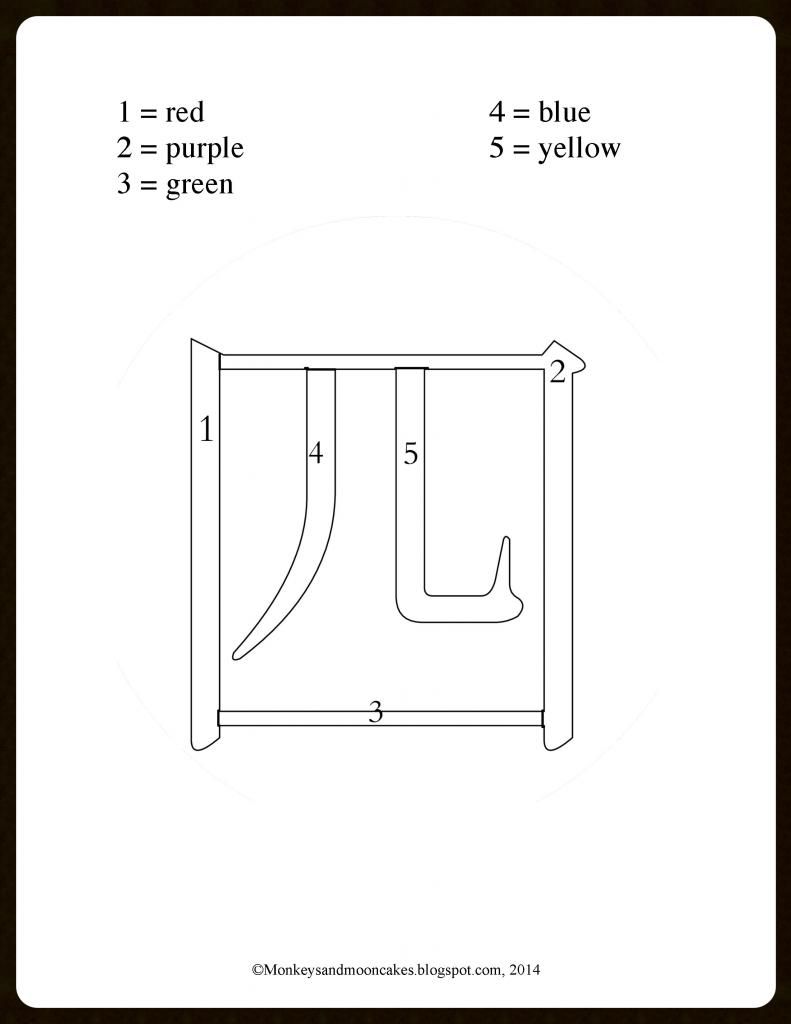
    • Create a color-by-number character--either draw one by hand or make one using Word and PicMonkey (see my tutorial here). 
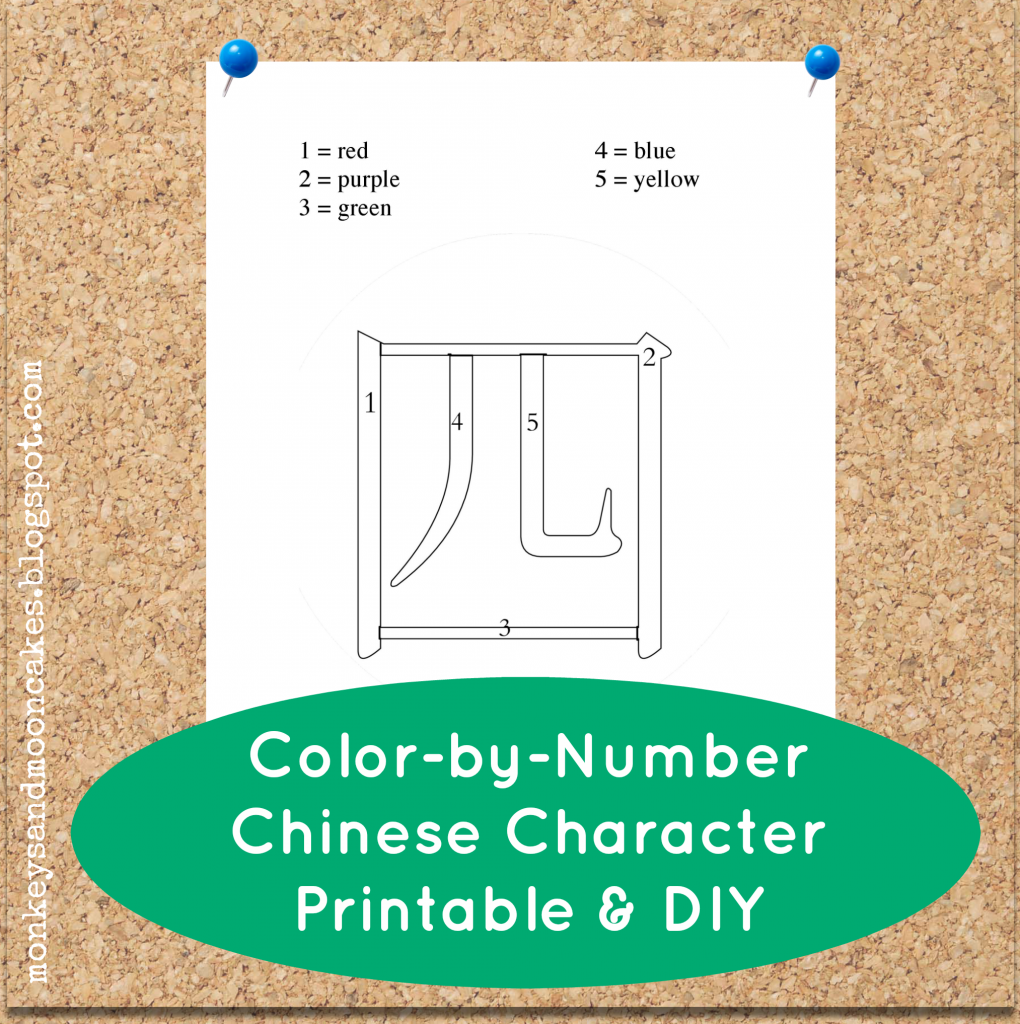
    • Click here to download the color-by-number page (pictured above) for the number four (四).
    • Grab some crayons and color the strokes of the character. 

    *********************************************************************************


     3. Play dough characters

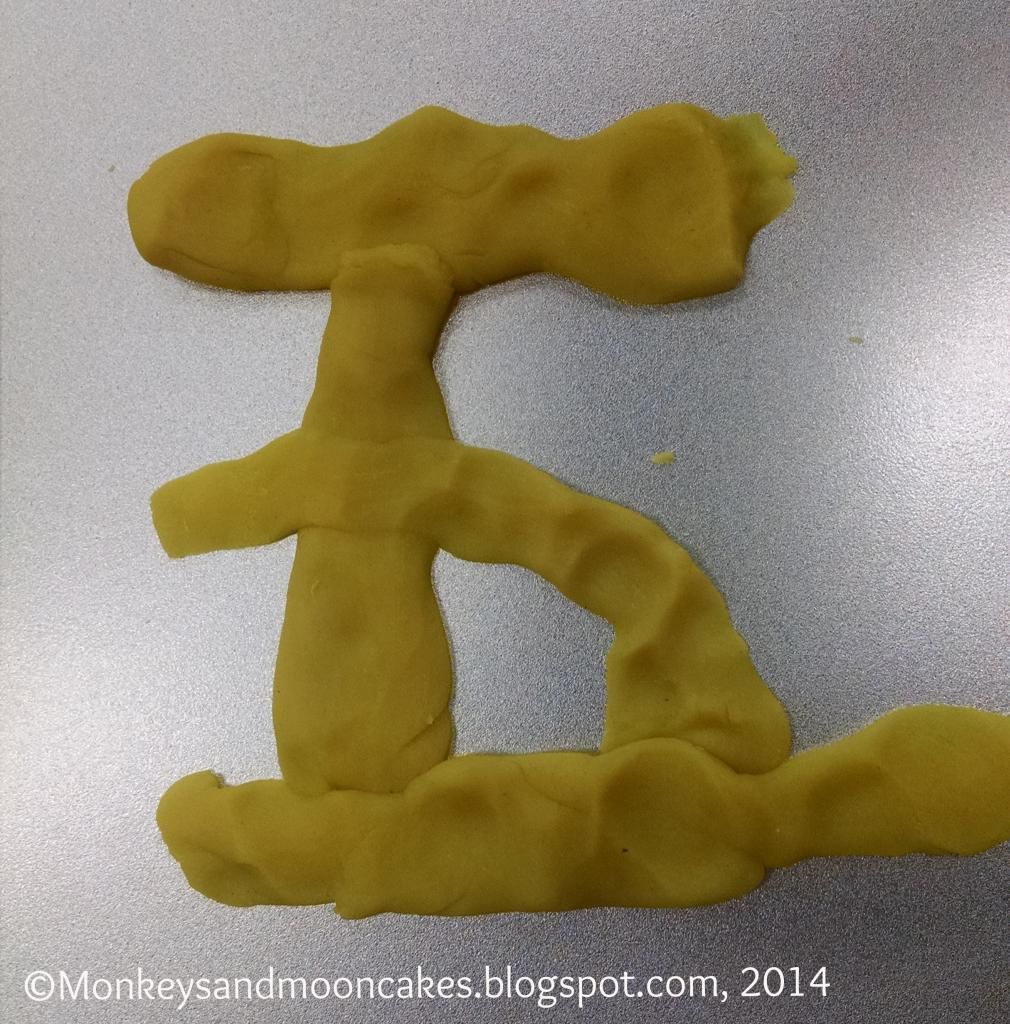
    • Form a character out of play dough by rolling "snakes" for each stroke and then assembling the strokes, or by mushing the play dough in to shape. 
    • Tip: Use a cookie sheet (we used small pans from the dollar store). These make clean up super easy and keep the play dough from rolling on the floor (which was important for us because we were using the library for our class!)

    What type of pre-writing activities do you do at your home?

    Check out my post 10 Sensory Activities for Practicing Chinese Characters for more ideas for character practice (including ideas that involve writing!). 
    post signature

    Friday, November 14, 2014

    Color-by-number Chinese Characters: Free Printable & DIY


    Earlier this fall, I searched for some pre-writing activities that could reinforce the Chinese characters I was introducing in an after school class I was teaching at my kids' school.

    When I couldn't find exactly what I was looking for, I adapted an old standard: 


    I discovered that the color-by-number idea works pretty well with beginning Chinese characters. And even better: it was accessible to the little ones in my class who were just getting used to writing with a pencil.

    Click here to download the snazzy color-by-number printable above. I've numbered each stroke of the character (4, sì), so each stroke should end up a different beautiful color.


    *****************************************************************************


    If you want to make your own color-by-number Chinese character, here are 2 ways you can do this:


    The first way is what I call the Easy Peasy Draw Your Own method.It's just as it sounds: Hand-draw your own color-by-number character. This is doable, even if you are just beginning to learn Mandarin. 

    1. Go to the dictionary at yellowbridge.com. You can input your word in English, Chinese characters, or pinyin. Then, after you've found the character you're looking for, click on "stroke order" to see how to write the character. 
    2. Write the character in outline form. 
    3. Section off the strokes, and number the sections.
    4. Write in your number/color designations (i.e. 1=yellow).
    And Done!


    ************************************************************************


    If you want a little more technical finesse in your final product...Turn it into WordArt!


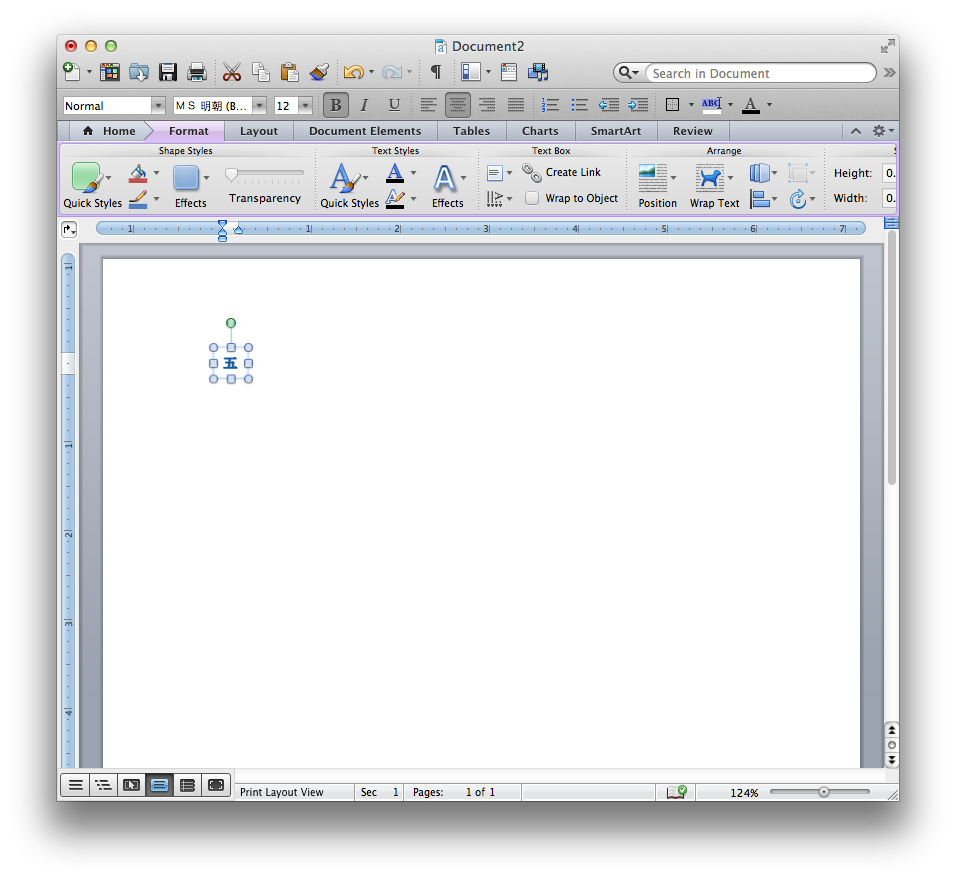
    1.  Using your Chinese input on your computer, type your character in a new Word document. 

    -->If you do not have Chinese input, you can type the pinyin into Google Translate, copy the Chinese character from Google Translate, and paste it into a Word document.

    -->If you want to get fancy, choose a different Mandarin font for the characters. I used Hannotate TC Regular because it looks like handwriting.

    2.  Highlight the character you just typed or pasted in the Word document. Select "WordArt" under the Insert menu. You should now see the Chinese character that you typed in outline form.

    -->This may look different on your computer depending on if you're using Mac/Windows and how recent your operating system is. Check out this link from Microsoft support to walk you through inserting WordArt in a Word document.

    3.  Adjust the style of your WordArt according to your preferences in the WordArt/Formatting toolbar. Again, the location of this toolbar will be different depending on your computer. Refer to the Microsoft Support page if you get stuck. 

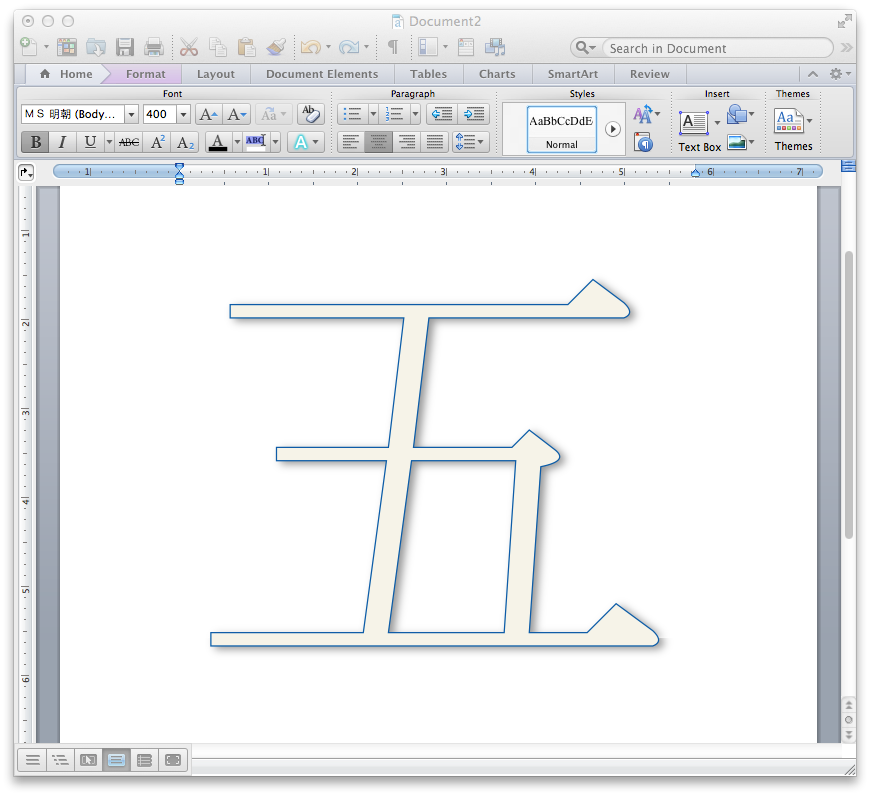
    4. Adjust the size of the new WordArt according to your preferences. I resized mine to 400 pt. You may have to expand the size of the text box to accommodate the bigger size. 

    5.  Now you have a choice to A. save, print, and then hand draw all the little dividing lines in to make it a color-by-number, or B. save as a PDF and upload to PicMonkey where you can do this on your computer.

    -->If you choose Option A, well done! Enjoy your new, snazzy Chinese character outline.

    -->If you choose Option B, very nice! Please read on for further instructions. 

    6. The next step is to convert your PDF to jpg. There are lots of free PDF to jpg converters online. I'm not an expert here, but take a look. 

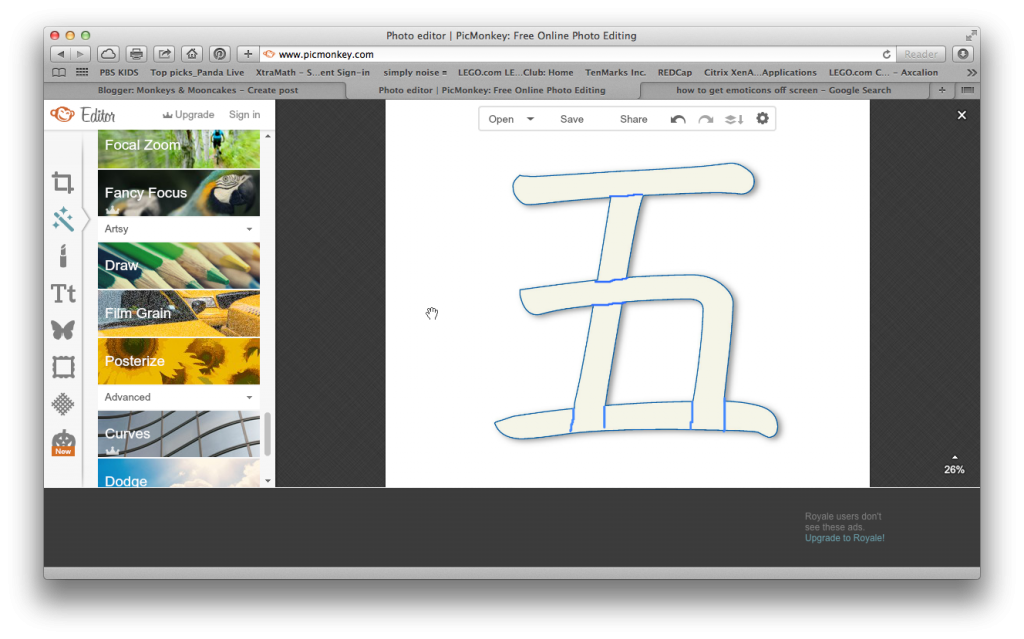
    7. Once you have converted and saved the WordArt character you created as a jpg, go to Picmonkey.com, choose "edit" and upload the jpg. 

    -->If you're not familiar with PicMonkey, it's awesome!!! It's a online photo editing tool. I use their free tools, but you can also pay a fee to access more tools (they're not paying me for this promo--I just really love the website=)

    8. After you have uploaded your jpg, choose the tool on the left side of your screen that looks like a tube of lipstick and scroll down the list of tools until you see "draw"(under "Artsy").

    9. Adjust the brush size and color according to preference, and then draw in any dividing lines (to separate strokes).
    10. Next, click on "T" (for add text) and click on the "add text" button. When the text box appears, choose a font and type in the numbers that will dictate which color to use when your little ones color in. Position and resize as you see fit.

    -->You will have to add a new text box for each number. 

    10. Once you are finished, save to your computer.
    And Done! You now have a nifty color-by-number Chinese character image that you can use in any document, using "insert picture." 


    What pre-writing activities do you use in your home to teach Mandarin?

    post signature